Wednesday, August 28, 2019

How to Troubleshoot YouTube Black Screen Problem

The solution might sound a bit difficult, but in reality it is not
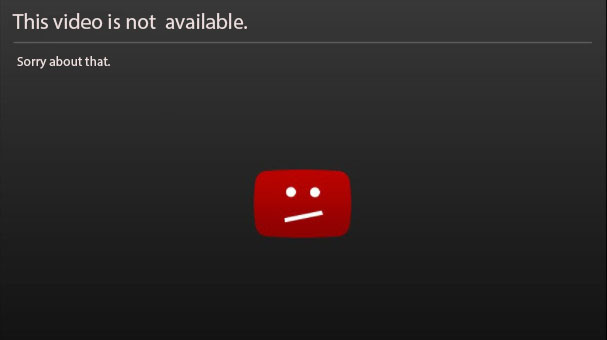
If you’re facing YouTube black screen problem, then this blog is perfect for you. This issue can happen because of many reasons. Some of the reasons can be issues related to PC, poor connectivity of net or local network, and so on.


Turning off ad blocker
  1. Firstly, go to YouTube.
  2. Then, play any video.
  3. After that, turn off the ad blocker for a temporary time.
  4. Next, reload the page and then play the video.
  5. Note that when the video is played, look at the documentation for the ad blocker to view if any option is stopping YouTube videos from playing.
  6. If you get to know that ad blocker is the reason for YouTube videos non-working, then you should not stop on blocking advertisement together. Instead, look for the list of ad block plug-ins and extensions, and check if any of them helps you out.
Fixing browser and computer issues causing the YouTube Black screen
  1. Firstly, prefer to reload the video of YouTube that was not working.
  2. Then, sign out from your YouTube ID.
  3. After that, close the browser and restart it.
  4. Next, look for browser updates.
  5. Then, update the browser if required.
  6. After that, remove the cache of the browser.
  7. Next, remove every YouTube cookie from the browser.
  8. Then, turn off hardware acceleration the web browser.
  9. After that, check a different web browser.
  10. Lastly, restart the PC.
Troubleshooting poor network and net issues causing the YouTube Black screen
  1. Firstly, power cycle the router and modem.
  2. If connected to the internet by Wi-Fi, then prefer wired connectivity or else shift the PC near the router.
  3. After that, try changing Dynamic Name Server (DNS) settings to use a free DNS.
  4. Next, prefer removing cache of the DNS.
  5. Then, go through the speed testing service for checking the status of the net connectivity.
  6. Note that, if there is any connectivity issue, then YouTube might not work in a perfect manner till the ISP solves the problem.
Check the youTube mobile app
  1. Firstly, remove the cache of application.
  2. Then, restart the system.
  3. After that, remove the application and install it again.
  4. Use the Google Play Store for YouTube
  5. Go to the App Store on iOS device.
  6. Next, give a try to see the video by using the phone’s web player by moving to youtube.com in a web browser.
Emily Williams is a self-professed security expert; she has been making the people aware of the security threats. Her passion is to write about Cyber security, cryptography, malware, social engineering, internet and new media. She writes for McAfee security products at mcafee.com/activate.

Top 10 Best Pool Games For Offline Play

Mostly everyone must have played pool game minimum once or twice. Do you want to play this game on your computer or smartphone? What happens when you don’t have an internet connection? If your answer is yes, then have a look at this blog carefully. After all, this blog comprises of pool games that are not only free but can also be played offline.
  1. Pool 2019 Free
This game has an easy to learn shooting guide for the beginners to learn different angles for giving the best shot. And has a variety of cue sticks to choose from. But at the same time, we can’t neglect the fact that even if we want to disable the cue guidance system, then it is not possible in the free version.
  • Pool Billiards Pro
It comprises a total of three levels of difficulty challenge thrown at the player. This too has a feature of changing the cue. Two of its negative points are that playing with a friend needs internet and advertisements keep irritating.
  • Pool Night
It is easy to play. And has an excellent aiming guide. Generally, people complain about the advertisements that come after each game, but when you play it offline, they can be prevented.
  • 3D Pool Ball
The best feature that distinguishes it from the rest is the options of 2D and 3D mode. The graphics of this game are very beautiful.
  • Micro Pool
The players can smoothly play this game. Most of the people love this game as it allows players to play against another person that too offline. Some people don’t prefer playing it because it doesn’t have any instructional guide for the learners.
  • 8 Ball Online Free Pool Game 2019
It is available in multiple languages. It presents plenty of options like 8 ball, 9 ball, Snooker and so on. The only feature that most people find annoying is that it keeps asking for mail log in whenever this game is loaded.
  • 8 Ball Pool
It avails 2 types of offline games for its users. The games are known as ”Pass n’ Play” and ”Play Quick Fire”. Both the games are fun to play.
  • Pool Break 3D Billiard Snooker
It has many games on it. And the best part is that each game of it is available offline. It does have a pro version. In this pro version, advertisements will not be irritating its players.
  • Kings of Pool
It is an online game and has plenty of challenges for its players. It comprises of classic graphics.
  1. Real Pool 3D
It has a fantastic feature of Facebook log-in that offers its players to play against their friends. Side by side, it also has features of 2D and 3D view.
Emily Williams is a creative person who has been writing blogs and articles about cyber security. She writes about the latest updates regarding mcafee.com/activate and how it can improve the work experience of users. Her articles have been published in many popular e-magazines, blogs and websites.

Tuesday, August 27, 2019

How to Solve "Failed to Install a Dependency" Error on Kodi in 2019?

Kodi is one of the best free media players especially made for large screens, and it is an open-source home theater software that works on various devices. Failed to Install a Dependency error can prevent installations of apps and add-ons. In this article, you are about to learn how to fix this error. 
There are a few things that can cause the “Fail to install a Dependency”  error such as cache data and more. There are three ways to solve this error and get your Kodi out of this kind of issue. So what’s the wait? Let’s begin.
Fix 1: Clear Kodi Cache
Clearing cache can solve a lot of problems on your Kodi. Many users have resolved this error by simply clearing their app cache. Let’s see how to do it:
  1. If you are using an Android Box with your TV, then go to the Settings of your device, head to Apps, and Choose Kodi. Hit the button labeled as “Clear Cache.” This will clear the cache data which can solve your Kodi error.
  2. If you are using Fire TV Stick to play Kodi on your TV, then go ahead into the Settings. Click on Application and after that, go to Manage Installed Applications. Then find and click on Kodi. There you have to navigate to the Clear cache button.
  3. If you own an Nvidia Shield TV, then you have to navigate to Settings and then to Apps. After that, find and choose Kodi from the available apps. There you will be able to get to the clear cache option.
  4. Windows / Mac / Linux: In these operating systems, you can easily clear the cache of the Kodi app. To do so, install the “Indigo” add-on to your device. You can Install the “Indigo” add-on from the web by simply searching for the “indigo add-on” on Google and by following the on-screen instructions.
Fix 2: Rebuilt Kodi’s Database
  1. First of all, run your Kodi application as an administrator on your device.  To do that on a Windows PC, right-click on the app, then choose the Run as administrator option from the list. If you own a Mac, then ensure that you got the admin privileges.
  2. After the Kodi opens head to the Gear icon located on the upper-left corner of your screen.
  3. Go to File managers.
  4. Browse the “File Directory” option located on the left side, by double-clicking on it.
  5. Now navigate to the Database folder.
  6. Find and delete the “Addon27.db” file.
  7. Now close the application and then keep it closed for a while and then open the Kodi app again on your device.
  8. This will also delete your add-ons, and you must install them again.
  9. It may solve the Dependency error from your Kodi app.
Fix 3: Manually Install the Dependencies
If you want to fix the ‘Fail to install a Dependency’ issue, then you have to install the dependencies manually on your Kodi app. here’s how to do it:
  1. Go to the Kodi app and then head to the Gear icon located on the upper-left corner.
  2. Head to File Manager.
  3. Double-click on the Add Source option on your left side.
  4. You will see a popup asking you for the address and there you need to click <None> to enter the address. You must enter “http://fusion.tvaddons.co&#8221; this URL to that field. Then give this source a name of your choice and hit OK.
  5. Go back to the Home of your Kodi app and then navigate to the Add-ons following by the main menu.
  6. There you have to get to the Open Package icon in the upper-left corner.
  7. Click on the “Install from zip file.”
  8. Head to recently added source and then go to the ‘TV Add-ons’ option.
  9. Now click on the “Kodi-scripts” option.
  10. There you will see several ZIP installation files. You have to install all of them because these all are essential files. So start by clicking the first one and install all of these ZIP files.
After following these tips, “Failed to Install a Dependency” error should be resolved on the Kodi app.
Emily Williams  is a Microsoft Office expert and has been working in the technical industry since 2002. As a technical expert, she has written technical blogs, manuals, white papers, and reviews for many websites such as office.com/setup.

How to Record Screen on iOS, macOS, Android, and Windows?

Are you wondering how to record videos of your device’s screen? If yes, then you have come to the right place. Suppose you want to make a tutorial video for your YouTube channel, or want to upload your gameplay or anything to engage your audience, then you must know how to capture a video of your device’s screen.
You may want to install a third-party application to record your display, but do you know that your device contains a hidden feature of screen recording? Yes, some OS indeed provide preinstalled screen recorders.
Recording Screen on Windows Devices
Yes, your Windows 10 indeed has its screen recorder.  It is a hidden feature on your Windows 10 PC. To get it, navigate to the Xbox app, which is a preinstalled app. To open it, hit the Start key and then search “Xbox.” Now hit the Start + G keys together on your keyboard.
There you can hit the Start recording button to start your screen recording to stop the recording, press Start + Alt + R keys together on your keyboard. The video will be automatically saved to your Videos folder, and the video will be in MP4 format.
You can also tweak its settings by simply logging into the Xbox app. There you have to go to “Game DVR” options. You will have options to change the settings according to your choice. The Settings doesn’t allow you to customize the output/saved recordings folder.  However, you will be able to choose the video quality, enable/disable audio recordings, or set a limit for video length.
 Sadly, not every Windows 10 device supports this feature because your PC must have a video card to record screen. The video card should support one of the below encoders:
  1. Nvidia NVENC
  2. AMD VCE
  3. Intel Quick Sync H.260
If your Windows PC does not have one of these video cards, then you might be unable to use this feature. You can go for other third party screen recorders for Windows.
Recording Screen on a Mac
If you have a Mac, then there is a built in app for this purpose. The app is QuickTime Player and you can use it to record your Mac screen. You only need to open this app, and further process is straightforward. 
If your Mac has macOS Mojave, then the recording process is even more straightforward. You only need to hit the “Shift+ ⌘ + 5” keys together on your keyboard, and the screen recording interface will appear on your device just after pressing those keys. The interface will have all controls that are needed to record your device screen.
Recording Screen on iOS Devices
Screen recording is one of the best features of the iPhone and iPad. No need to install any additional app to record the screen of your device.
  1. Head to the “Settings” then go to “Control Center,” and after that, go to “Customize controls.”
  2. Once you get there, find the “Screen Recording” option and then press the “Plus” button located next to it.  
  3. Now the feature is enabled and you can access it anytime by dragging your finger down to upward direction on your iOS device screen.
  4. If you own an iPhone X or newer, or any device which has iOS 12 or later, then you will have to swipe up and down on your device screen to access the screen recorder.
  5. Then you will see a Recording button, tap or hold it for a while to get recording controls.
  6. Now hit the “Start Recording” button and then your device will count to 3 and then screen recording will start automatically.
  7. Go to your Control Center and then hit the stop button. After that press the “Stop” button.
  8. Your recording will be saved to your storage, and you can easily access it from your Photos app.
Recording Screen of Your Android Device
Android Q will have built-in screen recording feature, but current Android versions don’t provide a built-in screen recorder as Apple devices do.
Android Q is not officially released yet, but if you have installed Android Q Beta on your device, then you can use its in-built screen recorder. See the below instructions to use the screen recorder on your Android Q phone:
  1. Head to settings and then navigate to ‘About phone.’
  2. Press seven times repeatedly on the “serial number” of your device.
  3. This will unlock the Developer Mode, which will give you access to some hidden features.
  4. Now go to the main settings page and then open “Developer options.”
  5. Head to “Feature flags” and then locate the flag labeled as “settings_screenrecord_long_press.” Toggle the switch located next to it and your screen recorder will be enabled.
  6. You can now use it any time by holding your power button and choosing start recording option.
Emily Williams  is a Microsoft Office expert and has been working in the technical industry since 2002. As a technical expert, she has written technical blogs, manuals, white papers, and reviews for many websites such as office.com/setup.

Monday, August 26, 2019

How to Turn Your Xbox Console into a PC

If you want to transform your Xbox into the computer, then you can do so by following the instructions mentioned below. As the Xbox console has the same computer specifications as the older PC have, you can easily convert it to a properly working computer.
Here’s how to turn your Xbox Console into a PC
·       Some necessary items
1.    USB cable adapter.
2.    Lexar JumpDrive Secure 128 and 256 MB.
3.    Otherwise, you will need a Kingston DataTraveler 32 and 256 MB.
4.    A Linux OS
5.    Xbox console
6.    Mechassault Xbox game
·       Getting the bootable Linux image on the USB stick
Start attaching the USB memory device to the console through the USB cable adapter.
1.    Enable the Xbox console.
2.    Start downloading the Mechinstaller.
3.    You need to flash the FatX image to the USB stick by pairing it with the computer.
4.    Start transferring the Mechassault picture to the USB device by pulling it.
·       Start copying the FatX image to the Xbox
1.    Delete the USB drive from the computer.
2.    Pair it to the console.
3.    Now, the USB will display in the Xbox dashboard.
4.    Go to the USB drive by going to the dashboard.
5.    Now, you will get the three options: Remove Linux, Emergency Linux, and Install Linux.
6.    Choose the Memory option.
7.    Choose the USB device.
8.    Press on the Install Linux option.
9.    Choose the Copy option.
10.  Select the Xbox hard disk option.
·       Open the copied picture to begin Linux
1.    Place the Mechassault game copy.
2.    Go in the Xbox dashboard hard disk.
3.    Choose the Emergency Linux file.
4.    In case you have done this procedure properly, the Xbox will get restart automatically.
5.    Now, your TV will display a black screen, which is having white letters.
6.    Go to the 192.168.0.3 IP address.
7.    Sign in with username and password registered with the Xbox.
8.    Once you have signed in, enter the below-given command which is xbox_tool-a to show the hard disk button.
9.    Start downloading the Linux copy.
10.  Insert it into the DVD-R.
11.  Insert the DVD-R in the Xbox for booting.
12.  Enter su to sign in as the admin.
13.  Start using the Xbox as your password.
14.  Enter XBOXLinuxInstaller in the given box.
15.  Go through the guidelines to finish the setup process.
Emily Williams is a Microsoft Office expert and has been working in the technical industry since 2002. As a technical expert, she has written technical blogs, manuals, white papers, and reviews for many websites such as office.com/setup.

How to View DDS Files in Your Windows 10 PC

DDS stands for DirectDraw Surface and it is an image file format. As it is the most famous compatible image file formats, so you must know how to view DDS files in your Windows 10 PC. In this article, you will get to know the steps to complete this procedure.
Steps to view DDS files in your Windows 10 PC using DDS viewer
DDS Viewer is a freeware software. This software is for launching the Microsoft DirectDraw Surface files.
  1. For opening the files with the software, press on the Download DDS viewer Setup.
  2. It is given on the program download webpage.
  3. Go to the DSS Viewer installed. It helps you add the software to Windows 10 PC.
  4. Open the DDS Viewer program.
  5. After that, choose the DDS file.
  6. It is located on the Open menu.
  7. Press on the Open option.
  8. You can change the size of the DDS file by typing the additional values into the Width and Height columns.
  9. Press on the green tick symbol.
  10. Click on the Rotate Image left and Rotate Image Right option.
  11. This option will help you to rotate the DDS file.
Steps for Adding the NVIDIA texture tools plugin to Adobe Photoshop
  1. You can launch the DDS file by using the alternative NVIDIA Texture Tools.
  2. Press on the Download option.
  3. It is given on the NVIDIA Texture Tools webpage.
  4. After that, press on the 32 or 64 bit Windows for downloading the installer which helps you to install the NVIDIA Texture Tools plug-in which supports the architecture of your computer.
  5. Press on the Photoshop_Plugin installer for installing the plug-in tool.
  6. Once you have installed the plugin option, press on the Filter option given in the Adobe Photoshop.
  7. Choose the NvTools option.
  8. Click on the NormalMapFilter option.
  9. It will launch a new window.
  10. This window contains DDS files many options given in the Adobe Photoshop.
Steps for Converting the DDS File to PNG
  1. Additionally, you can start converting the DDS file to PNG pictures which you can launch with the editing program.
  2. To complete this procedure, go to the Convert DDS to PNG convertor in your browsing application.
  3. Press on the Choose files option to choose the DDS file for converting it.
  4. After that, press on PNG.
  5. It is located in the Target format pull-down menu in case you have not chosen it already.
  6. Click on the Convert Now option.
  7. After that, press on the  Save option for downloading a new PNG.
Emily Williams is a self-professed security expert; she has been making the people aware of the security threats. Her passion is to write about Cyber security, cryptography, malware, social engineering, internet and new media. She writes for Norton security products at norton.com/setup.

Wednesday, August 21, 2019

How to Access and Apply Design Themes in your PowerPoint Slides

Microsoft PowerPoint offers its users multiple themes to choose and apply to their presentation. If you’re bored with that ordinary view, including, text, font styles, size, and background, then you can change it. Also changing the design themes in Microsoft PowerPoint is one of the easiest things. In this guide, the steps are given for Microsoft PowerPoint 365, 2019, 2016, 2013, 2010 and may also work in some older version. Here is how to access and apply design themes in your PowerPoint Slides.

How to access the Design Theme in Microsoft PowerPoint
The instructions given here apply to the latest versions of the PowerPoint application, including and after 2010.
1.   Open your presentation that you want to use. If you don’t want to risk your presentation, then try the applying to a new or copy of the document.
2.   Go to the ‘View’ tab.
3.   Look for Master View group and click on ‘Slide Master’ into it. This will open the Slide Master tab into the ribbon.
4.   Now, Pick the Master Slide of the presentation. It is the topmost slide under the left side Slide panel.
5.   Look for Edit Theme group in the ribbon, and click on the downward-facing arrow of ‘Theme.’ It will open a small dialog box with the available themes that you can apply straight away to your presentation.
6.   Find the one you want to apply and click on it.
Your selected theme will be applied to the slide layouts of your presentation. If you want to change it, then choose another form the available design themes.
 How to add further themes to the Slide Master in PowerPoint
If you want to add extra design theme to the Slide master, then don’t close the presentation and open dialog box. Unfortunately, if you’ve closed, then reopen them before going ahead. It’s a simple trick and just requires your few clicks. Here is how.
1.   In the left side Slide panel, go the bottom by scrolling.
2.   Now, click and select the empty space lower than the last slide thumbnail.
3.   After that, open the Design themes dialog box by clicking the downward-facing arrow of “Theme” in the ribbon.
4.   Find a different theme you want to use and click on it.
Doing so opens a whole new slide master set in the left side Slide panel. Don’t worry your original slide master set is safe, the new set opens below it. Now, add the design themes to your presentation, after you finish adding themes, click ‘Close Master View’ to close. Don’t forget to save your presentation before exiting.
Emily Williams is a self-professed security expert; she has been making the people aware of the security threats. Her passion is to write about Cyber security, cryptography, malware, social engineering, internet and new media. She writes for McAfee security products at mcafee.com/activate.

How to Troubleshoot YouTube Black Screen Problem

The solution might sound a bit difficult, but in reality it is not If you’re facing YouTube black screen problem, then this blog is perf...